6NoMi: The Age of Refinement

The 6NoMi RF project, designed for use with Arduino or standalone, is now sporting a major upgrade with a four layer PCB. While removing the castellations of the earlier version and maintaining it’s Arduino compatible pin out, the new four layer design also features a reduction in size at 23 x 30mm.

The 6NoMi is based on the STM32W108 which combines a low power ARM Cortex M3 and an 109dB 802.15.4 radio. IEEE 802.15.4 specifies the physical layer and media access control for low power personal area networks forming the basis of 6LoWPAN, ZigBee, MiWi and many other protocols. The 6NoMi will exploit the multi-threaded Contiki RTOS to build a platform that allows the 6NoMi to play nice with the Arduino development environment through a simple but powerful Arduino library. The 6NoMi will allow Arduino users to create a seamless, end to end, low power network extending from internet to appliance.

The high quality four layer boards were produced by Laen of  http://dorkbotpdx.org/wiki/pcb_order

AtTouch Library for Arduino and the AT42QT1070

As a follow up to the previous post, I would like to present to readers the new AT Touch for the Arduino. This library wraps the code mentioned in the previous article in a nice easy to use Arduino Library. The name “AtTouch” comes from At (Atmel, so we don’t confuse it with other brands of touch capacitance chips) and Touch because its for their 7 channel touch capacitance chip, the AT42QT1070.

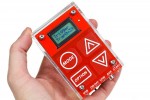
We created this library during our development of the Trigger Trap which heavily relies the AT42QT1070 for its 4 main user interface buttons.

tt-press-00-triggertrap_main_press_image2

 The Library uses the Arduino Wired library to communicate with the AT42QT1070 via i2C. This means the AT42QT1070 has to be used in Coms mode, not standalone. The schematic below is taken from page 6 of the datasheet, please refer to the datasheet for greater details on the chips layout.

Once you got the chip all wired up in Comms mode, to the Arduino you should be ready to start programming with the AtTouch library. The first step is to of course download the library: Download AtTouch

The next thing to do is to place the library folder labeled AtTouch in your sketchbook/libraries folder. Then place the example folders in your sketchbook folder.

Open up the example titled “AtTouch_press”.

“AtTouch_press” is the the simpler example, that just give you the plain functionally of a single button press. The library is very simple to use, but I will explain each detail below:

At the start of your sketch be sure to include both the Wire.h library and the AtTouch.h library. The AtTouch.h depends on Wire.h so make not forget it.

#include 
#include 

The following line declares the pin number of the external interrupt you want to use. The Arduino Uno only has 2 pins that work as interrupts. Pin 2, or 3. Its your choice, but obviously make sure it matches the CHANGE wire from the AT42QT1070.

int interruptPin = 3;

After that, its just a matter of instantiating the library object, and declaring a simple variable to hold the currently active key value.

AtTouch touch;
int hitKeyNum;

The next important part of the code, is in the loop function. The touch.hit() member function just returns true or flash, whether or not a key has been pressed. If the key has been pressed the we call touch.readActiveKey() in order to find out which key has been pressed.

if(touch.hit() == true)
  {
	hitKeyNum = touch.readActiveKey();

The variable hitKeyNum holds the key number. The AT42QT1070 key numbers are labelled 0-6. However there is one exception to this. When a user stops pressing a key the function touch.readActiveKey() will return a “9”. What this means is the key is now up. Its a signal to the user that the key is no longer pressed. Thats all there is to, it! I told you its simple!

The next example demonstrates how to use press and hold functions as well as single press.

Everything is essentially the same as the previous example, but you need to add another set of if statements to use the additional function.

if(touch.hold() == true) //press and hold
  {
    keyDown = true;
    hitKeyVal = touch.getKey();
  }

the touch.hold() function works just like the touch.hit() function however its actually timing your press to see if the key is held longer then 900msecs. If it is held longer, then it sets a boolean variable to keyDown true, and allows you to execute some specific code when that state is set. Also the touch.hold() can be used in conjunction with touch.hit() so you can detect one or the other for each key. In the following code we are using hold just to output a value multiple times rather then just once with a one time press:

  if(touch.hold() == true) //press and hold
  {
    keyDown = true;
    hitKeyVal = touch.getKey();
  }

  if(touch.hit() == true) //just press once
  {
    keyDown = true;
    //read which key was hit
    hitKeyVal = touch.readActiveKey(); 
  } 

  if(keyDown == true)
  {
    keyDown = false;
    digitalWrite(ledPin,HIGH);

        Serial.print("button #");
        Serial.print(hitKeyVal);
        Serial.println(" Down");

  }

Anyway that should get you started with the AtTouch library. As you can see its super easy to use, and really there is not much to explain, so there is no excuse not to add touch capacitance buttons to your next project!

Arduino capacitive touch sensing with the AT42QT10XX

Capacitive touch sensing has never been easier with the Atmel AT42QT1070. Out of the box it self calibrates and requires little to no setup. As well, it re-calibrates upon timeout when signalling high for an extended period. To implement this sensor in I2C mode on the Arduino platform requires but a few lines of code as follows:

#include <Wire.h>
 
 Wire.beginTransmission(0x1B); // start conversation
 Wire.send(0x03);              // 'key status' register
 Wire.endTransmission();       // stop transmitting
 Wire.requestFrom(0x1B, 1);    // request 1 byte
 reading = Wire.receive();     // get yer red hot bits

Video after the break…

New Developments: Trigger Trap

The Trigger Trap is an Arduino compatible universal camera trigger. Supporting out of the box laser, light, sound and time lapse triggering, the Trigger Trap brings the ease and simplicity of the Arduino development environment to photography.

Currently in development, the Trigger Trap will support wired camera triggers through an electrically isolated dual port connection, as well as wireless triggering by way of an IR port. A dual auxiliary connector allows external sense events to be processed by the on board ATmega328 micro controller, extending functionality by comprehending the physical world. An 8×2 character display, touch interface, low power consumption and a clear acrylic shell round out the features the Trigger Trap brings to the table.

Currently accepting pre-orders, the Trigger Trap can be found at TriggerTrap.com and Kickstarter.

QR Code: Hardlinking the Internet of Things…

QR is the abbreviation for quick response, a 2D bar code standard developed in Japan that can be decoded with a webcam or camera phone. They can be used to store numbers, characters and most importantly, hyperlinks. Since NoMi Design has an obsession with all things related to The Internet of Things, we love QR codes. While we haven’t dreamed up any fancy QR code hardware projects today, we are thinking about them. In the mean time if you have any wild hardware projects involving QR codes (or something else) that you would love to see realized, let us know and we can work with you to develop it. Though NoMi design spends countless hours working on in house innovations, we also do consulting and product development for others. In the near future expect to see QR Codes on all NoMi Design Products.

One Chip To Rule Them All

NoMi Design is now beta testing its new project the 6NoMi. The 6NoMi is a wireless device designed for use with the Arduino or as a standalone wireless mote. The 6NoMi is based on the STM32W108 which combines a low power ARM Cortex M3 and an 109dB 802.15.4 radio. IEEE 802.15.4 specifies the physical layer and media access control for low power personal area networks forming the basis of 6LoWPAN, ZigBee, MiWi and many other protocols. The 6NoMi will exploit the multi thread Contiki RTOS to build a platform that allows the 6NoMi to play nice with the Arduino development environment through a simple but powerful Arduino library. The 6NoMi will allow Arduino users to create a seamless, end to end, low power network extending from internet to appliance.
In the words of Paris Hilton, “That’s Hot!”

How to: Adding an image to an Eagle layout.

When your using Eagle to design and layout circuits, at some point you may want to add an image. While Eagle easily supports adding text, we are going to use a specific font and adjust the kerning to create the desired result.

1) Using the drawing package of your choice, create the image, use only black. Make it large, here it is 2000 pixels wide. Set the mode to grayscale and save it as an 8-bit BMP.

2) Start Eagle and open your layout. Choose Run from the file menu and locate the “import-bmp” script. click OK to the dialog.

Locate your BMP file and click OK.

3) As PCB silk screen is a single color we want to select “No scan” and then select the top left box for the color black followed by OK.

4) If all went as planned you should see the dialog indicated on the right. Here we can select the scale as well as the layer. Common choices are Layer 21 tPlace (top layer) and 22 bPlace (bottom layer). It’s possible to use a copper layer as well. Click OK to continue.

5) Choose “Run script” on the next dialog that pops up and wait for a bit.

6) Finally your image will be added to the layout at the origin. As the image is made up of many horizontal lines, to move your image you will have to use the select group tool first. If you happen to select unwanted parts, you will want to hide all layers except layer 21, from View menu, Display/hide layers…

What can castellations do for you?

Castellations are a low cost connection method that turns the PCB into a surface mount sub-assembly. They are commonly used on small radio assemblies and as breakout boards for fine pitch SMD components. This first attempt has proved very informative. As can be seen, a section of the plated through hole remains, likely the result of a dull end mill. Images shown are of 200x and 20x magnification respectively… krazatchu